# Angular quick start
Mount a standalone Angular canvas with two connected nodes, two-way data bindings and a button that frames the diagram through `viewChild`.
Framework bindings are thin skins over one headless model: specs describe your intent, live models hold the data, and the engine owns behavior.
## Prerequisites
Use an existing standalone Angular CLI application. The binding supports Angular 18.1, 19, 20, 21 and 22, with RxJS `^7.8.0`. Keep `@angular/common`, `@angular/core`, `@angular/forms` and `@angular/platform-browser` on the same Angular version as your application. This sample runs in the browser.
## 1. Install the binding
Run this in your application's directory:
```bash
npm install @grafloria/angular@0.14.0 @grafloria/renderer@0.5.0 @grafloria/engine@0.4.0 @grafloria/element@0.5.0 rxjs@^7.8.0
```
You get the Angular component and its engine, renderer and element peers. Import [`DiagramCanvasComponent`](https://bench-grafloria-61d.atloria.app/p/bench-grafloria-61d-mQCmWpDrxv/developer/grafloria-angular-components-diagramcanvascomponent#diagramcanvascomponent) into your standalone component; the canvas needs no library stylesheet import, NgModule or provider.
## 2. Define the flow and mount the canvas
Replace `src/app/app.component.ts` with the following component. Describe the initial data with [`NodeSpec`](https://bench-grafloria-61d.atloria.app/p/bench-grafloria-61d-mQCmWpDrxv/developer/grafloria-renderer-instance-nodespec#nodespec) and [`EdgeSpec`](https://bench-grafloria-61d.atloria.app/p/bench-grafloria-61d-mQCmWpDrxv/developer/grafloria-renderer-instance-edgespec#edgespec). The binding accepts both specs and live models, so use [`NodeInput`](https://bench-grafloria-61d.atloria.app/p/bench-grafloria-61d-mQCmWpDrxv/developer/grafloria-renderer-instance#nodeinput) and [`EdgeInput`](https://bench-grafloria-61d.atloria.app/p/bench-grafloria-61d-mQCmWpDrxv/developer/grafloria-renderer-instance#edgeinput) for the two-way signals, matching the canvas's readonly, optional collection types.
```ts title="src/app/app.component.ts"
import { Component, signal, viewChild } from '@angular/core';
import { DiagramCanvasComponent } from '@grafloria/angular';
import type {
EdgeInput,
EdgeSpec,
NodeInput,
NodeSpec,
} from '@grafloria/renderer';
const initialNodes: NodeSpec[] = [
{
id: 'a',
position: { x: 60, y: 80 },
size: { width: 180, height: 80 },
label: 'Ingest',
},
{
id: 'b',
position: { x: 380, y: 80 },
size: { width: 180, height: 80 },
label: 'Publish',
},
];
const initialEdges: EdgeSpec[] = [
{ id: 'e1', source: 'a', target: 'b' },
];
@Component({
selector: 'app-root',
standalone: true,
imports: [DiagramCanvasComponent],
template: `
`,
})
export class AppComponent {
readonly nodes = signal(initialNodes);
readonly edges = signal(initialEdges);
readonly canvas = viewChild.required(DiagramCanvasComponent);
fit(): void {
this.canvas().fitToContent(40);
}
}
```
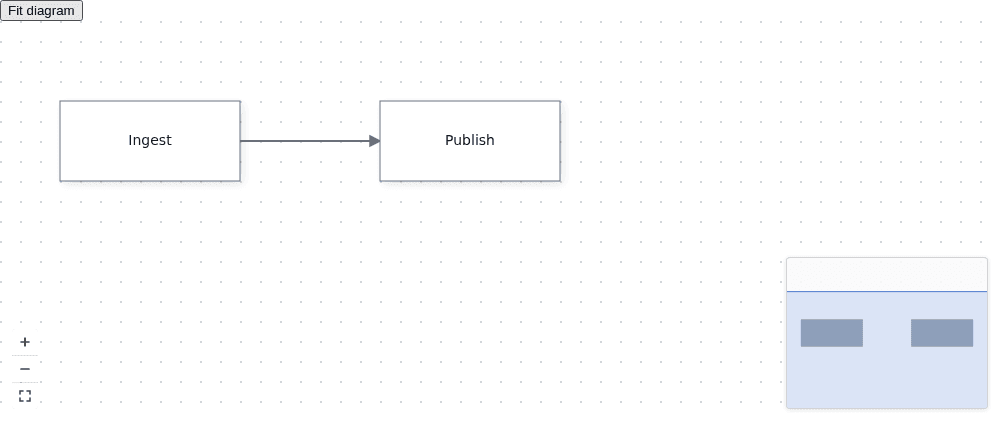
The canvas shows **Ingest** on the left, **Publish** on the right and an edge between them. `[plugins]="true"` adds the shipped minimap, zoom/fit controls and background grid; you do not need to build those controls yourself. The component has an explicit 400-pixel height; see [Theme a canvas](https://bench-grafloria-61d.atloria.app/p/bench-grafloria-61d-mQCmWpDrxv/developer/theme-a-canvas) for container sizing.
`[(nodes)]` and `[(edges)]` form the controlled return path. The canvas reconciles incoming arrays into its live model, then writes new spec arrays back through the model signals when the model changes. Dragging a node therefore updates your application state, not only the rendered box. You do not need separate change handlers for these two-way bindings.
The `canvas` query gives you the mounted component. Click **Fit diagram** to call `fitToContent(40)`: it centers the content and chooses a zoom that leaves 40 screen pixels of padding. The method returns `void`. For engine access, `this.canvas().activeEngine()` returns the bound engine or the canvas-owned engine; make engine-touching setup calls in `ngAfterViewInit`, not the constructor.
## 3. Bootstrap and run
Use this browser entry point to mount `AppComponent` on the application's `` element:
```ts title="src/main.ts"
import { bootstrapApplication } from '@angular/platform-browser';
import { AppComponent } from './app/app.component';
bootstrapApplication(AppComponent).catch((error: Error) => {
console.error(error);
});
```
Start your application:
```bash
ng serve
```
Open the local URL printed by the Angular CLI. Drag **Ingest**, then click **Fit diagram** to bring both nodes back into view. The component cleans up its plugins and rendering resources when Angular destroys it; this controlled sample does not require a manual disposal call.
You now have a sized canvas, two connected nodes, application state that receives diagram edits and imperative access through Angular's view query.
## Where next
Try the [live Angular starter](https://stackblitz.com/github/grafloria/grafloria/tree/main/starters/angular?file=src/app/app.component.ts), or open the [Angular demo gallery](https://grafloria.com/demos-angular/).
- [Angular: state and tooling](https://bench-grafloria-61d.atloria.app/p/bench-grafloria-61d-mQCmWpDrxv/developer/angular-state-and-tooling) covers signals and component methods beyond this first canvas.
- [Angular: templates and handles](https://bench-grafloria-61d.atloria.app/p/bench-grafloria-61d-mQCmWpDrxv/developer/angular-templates-and-handles) replaces the built-in node appearance with Angular templates.
- [Lay out a diagram](https://bench-grafloria-61d.atloria.app/p/bench-grafloria-61d-mQCmWpDrxv/developer/lay-out-a-diagram) arranges nodes automatically.
- [How Grafloria works](https://bench-grafloria-61d.atloria.app/p/bench-grafloria-61d-mQCmWpDrxv/developer/how-grafloria-works) explains specs, live models and the engine.